
Tutorial: Importing a flow into Node-Red
Node-Red is a graphical, drag and drop, point and click programming environment that uses “nodes” that are “wired” together to do things that create a “flow” of information. The vast majority of eRVin runs in Node-Red and consists of many small flows that all make up one, much larger flow.
There are many cases where an update, or some new capability, has been made available for eRVin in the form of a “flow file”. A flow file is simply a text file that contains the programming info. When this file is imported into Node-Red, it will be converted into the nodes, wires and other graphical bits that make up the flow and do something useful.
This post describes the simple process of importing a flow. This is the equivalent, of say, opening a file in Word or some other program. Node-Red doesn’t use the familiar Open and Save file methodology, so we use Import and Export instead to open and save flows.
Importing a Flow
- If you have never connected to Node-Red before and need an introduction, please see this short tutorial.
- Locate the flow file you want to import. Usually, this will be made available specifically for you via an email attachment, or may be posted online, such as here. Save it to a convenient directory on your Mac or PC.
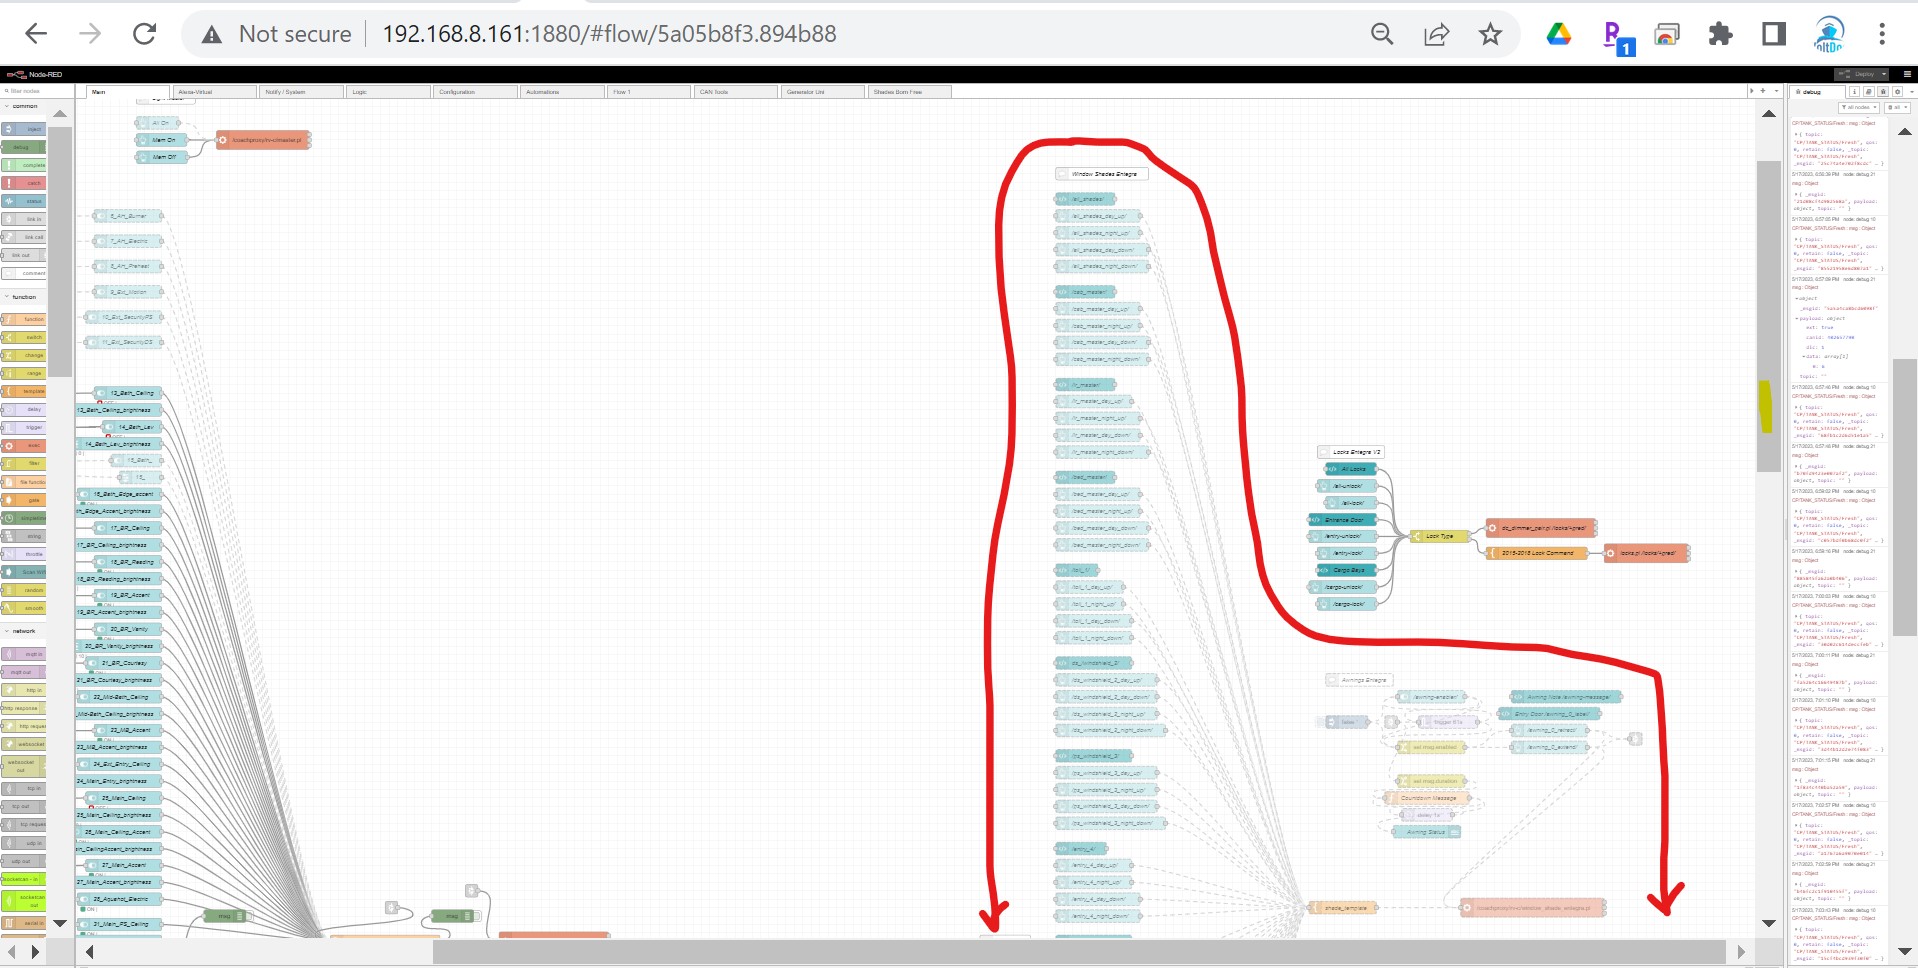
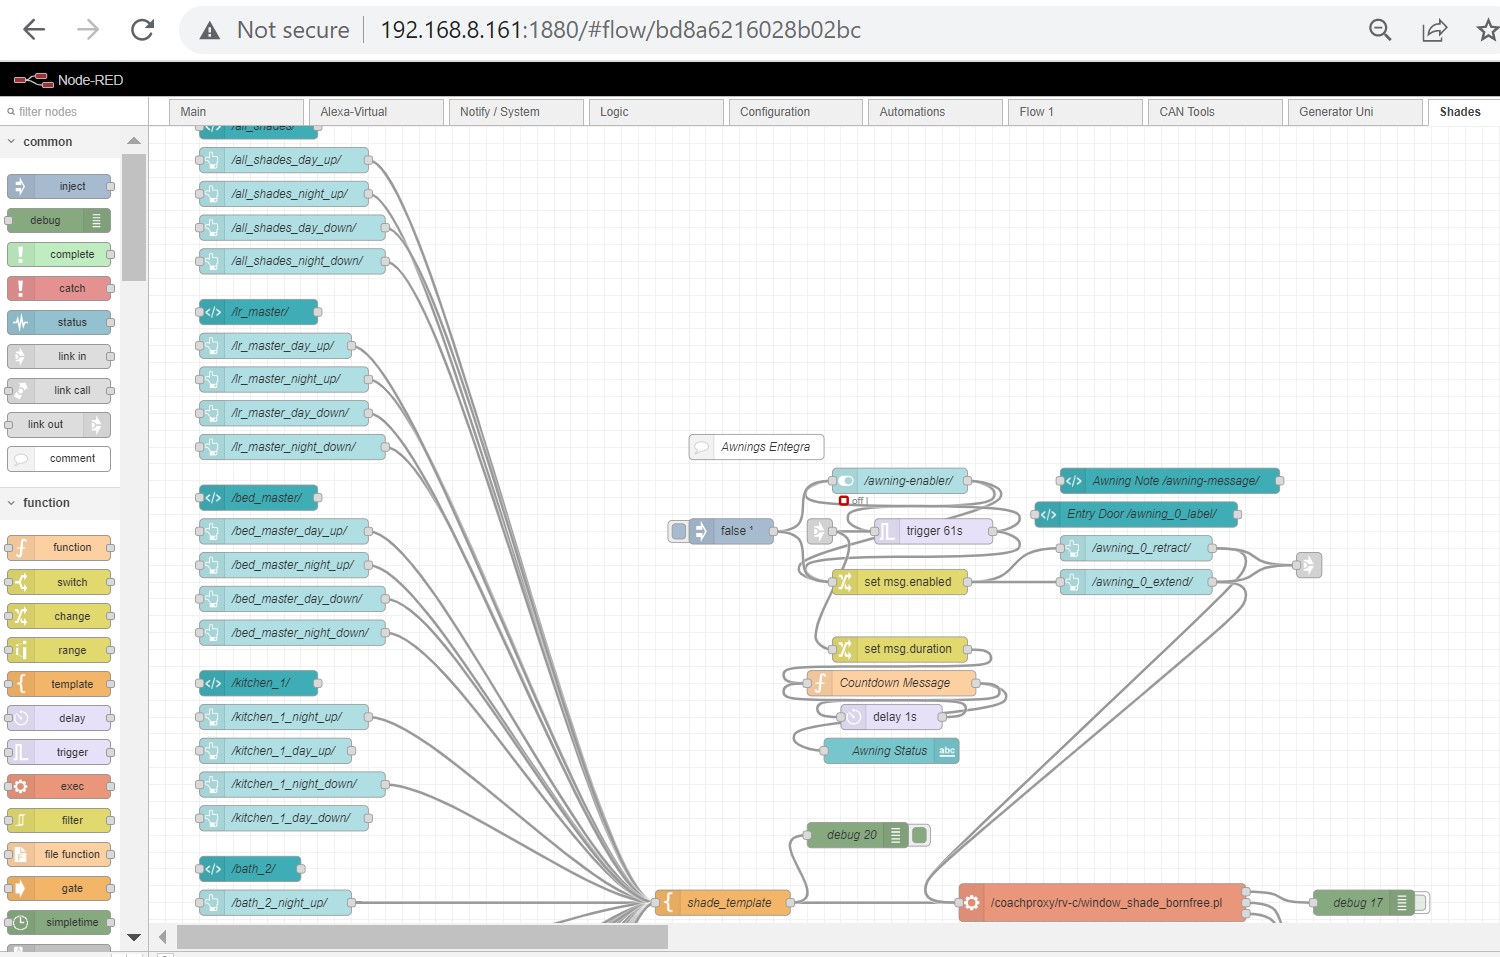
- Sometimes, the new flow is an update to replace an existing flow, so the old flow should be deleted or disabled. Specific instructions will typically be provided to help you find the old flow. This is simply a matter of dragging a box around a specific group of nodes, or holding down the CTRL key and clicking with the mouse, to select them. Then click the delete button. The graphic below shows the Shades flow that has been indicated for deletion by the red outline.

- When importing the new flow, it is suggested to create a new “Tab” for it. The tabs are located at the top of the Palette. This avoids clutter and provides for future ease of modification. As shown in the image below, click the highlighted + button. This will add a new empty tab at the top of the palette.
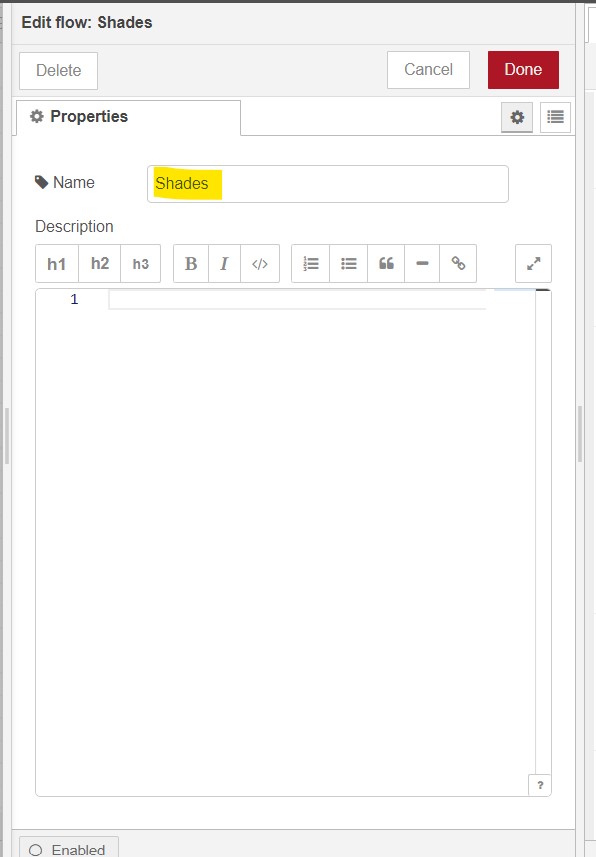
- Double click the tab and rename it appropriately. In the example below we are creating a new Shades tab. When finished, click Done.
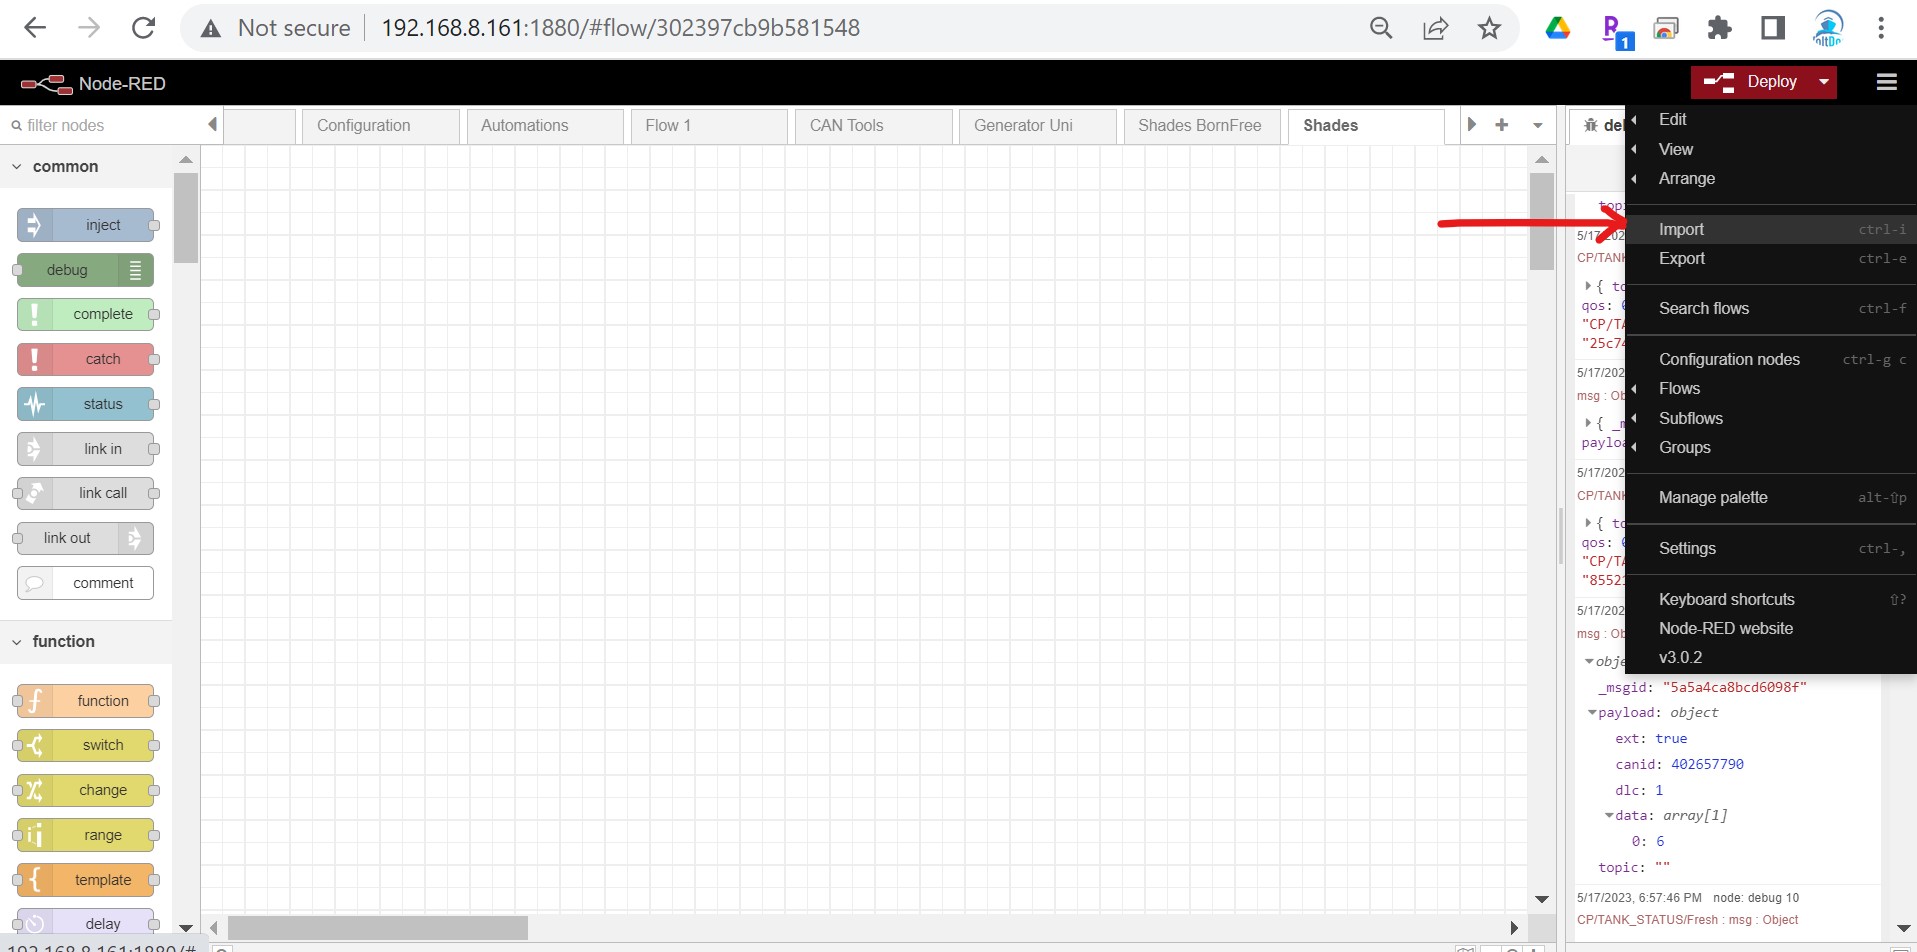
- Now, with the new blank tab still selected, select Import from the hamburger menu to the right of the Deploy button as shown below:
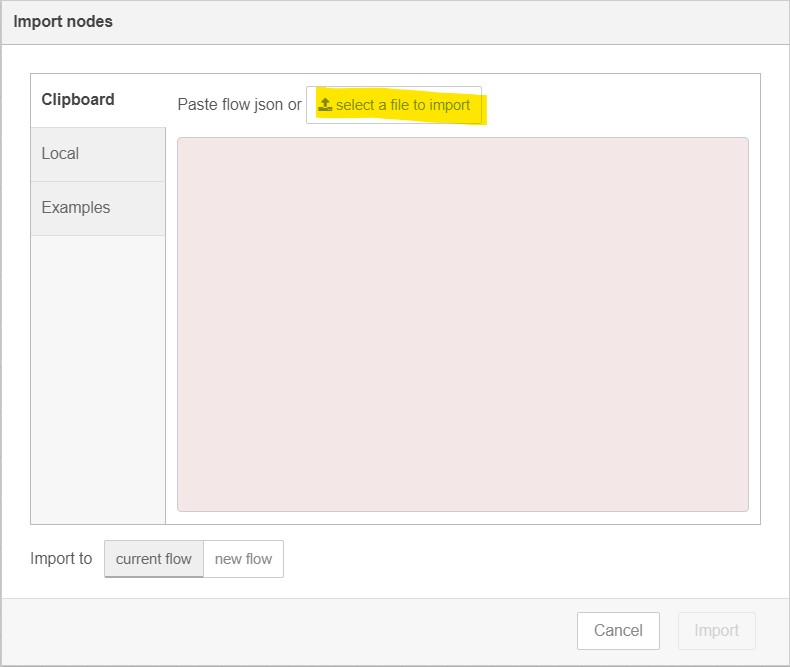
- As shown below click select a file to import and choose the file that was downloaded to your Mac or PC in Step 2.
- The new flow should import and will be grouped as a single draggable item. Drag it to your preferred location and click to drop it there. In the example below a new Shades flow is shown.
- Now click the Deploy button to save your changes and try out your new flow!

Rob, I have a flow that will use a photo taken of the Outputs screen in the Firefly settings panel and return a json with all the device names, instances, and category. Are you interested in exploring a new autu-detect method for configuring eRVin?